
A Simple Guide to Booking Desks with Clearooms

In a world where by hybrid working is the norm and office space no longer needs to accommodate the entire workforce every day, finding a suitable workspace can be a challenge. Fortunately, Clearooms provides a seamless solution for desk booking, effortlessly. Whether you're a remote worker, a freelancer, or part of a large organisation, this software streamlines the desk reservation process, allowing you to focus on your work without the hassle of searching for an available space.
In this guide, we'll walk you through the step-by-step process of booking a desk using Clearooms. Get ready to optimise your productivity and make the most of your workday with this user-friendly tool. Let's dive in and discover how easy it is to secure your preferred workspace with the Clearooms Portal!
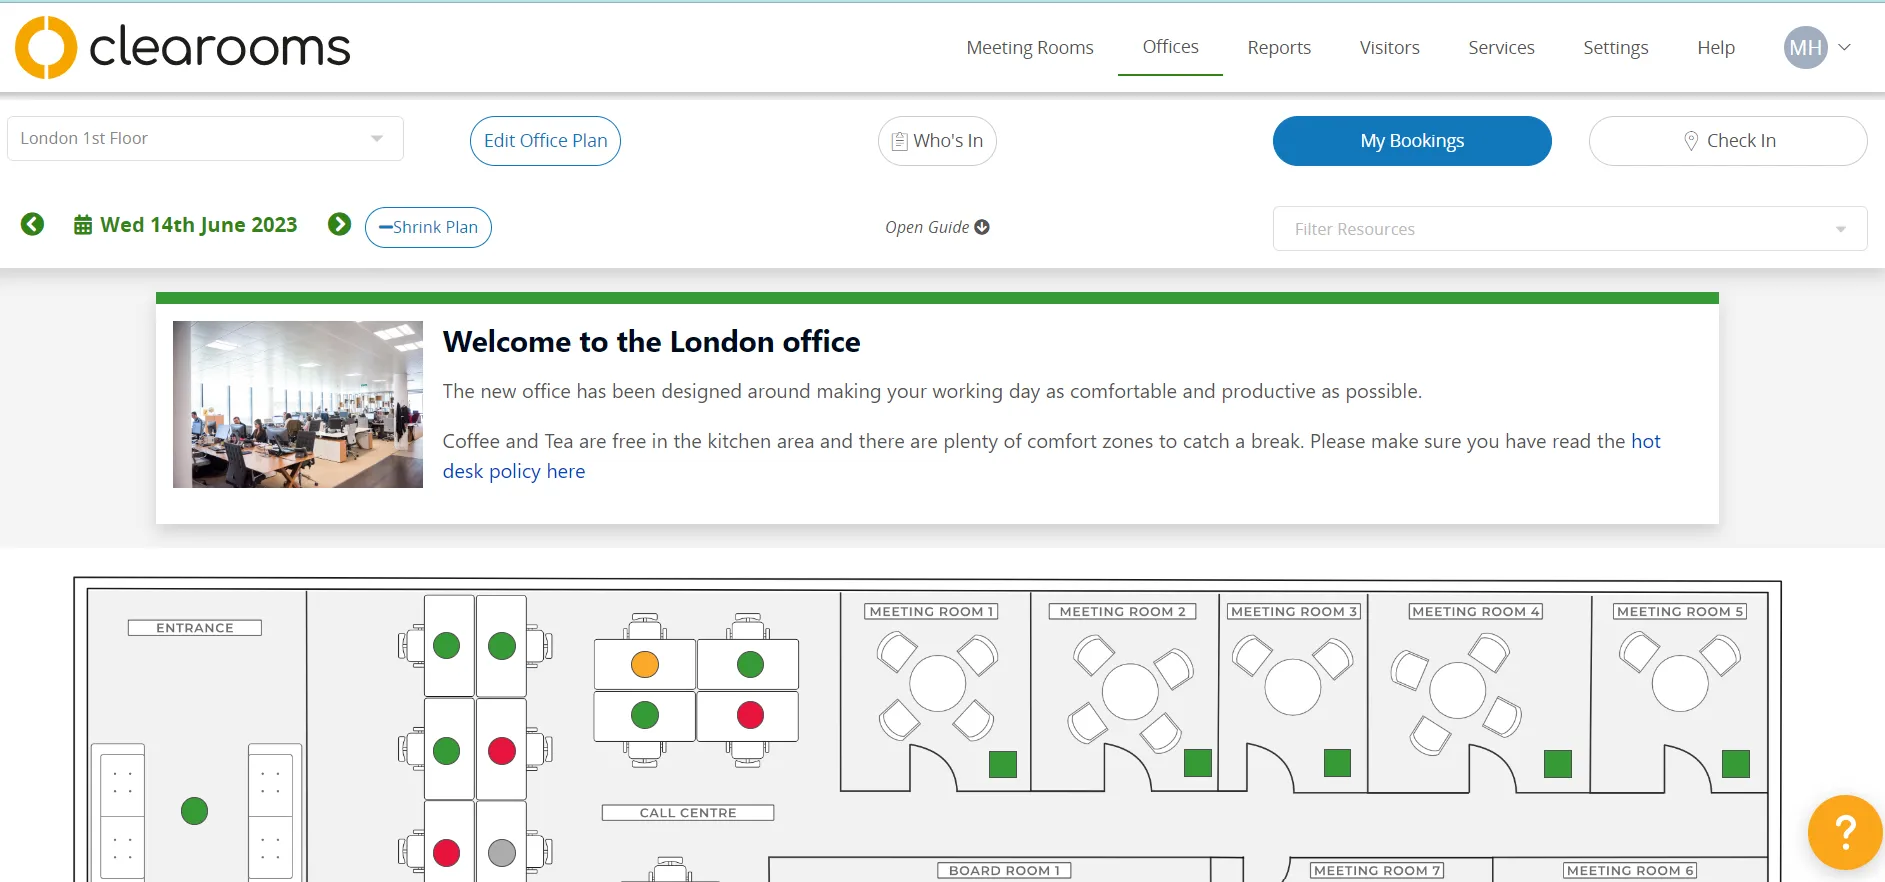
Step 1:
After logging into the Clearooms Portal, locate the 'Offices' tab situated at the upper right corner of the portal interface.
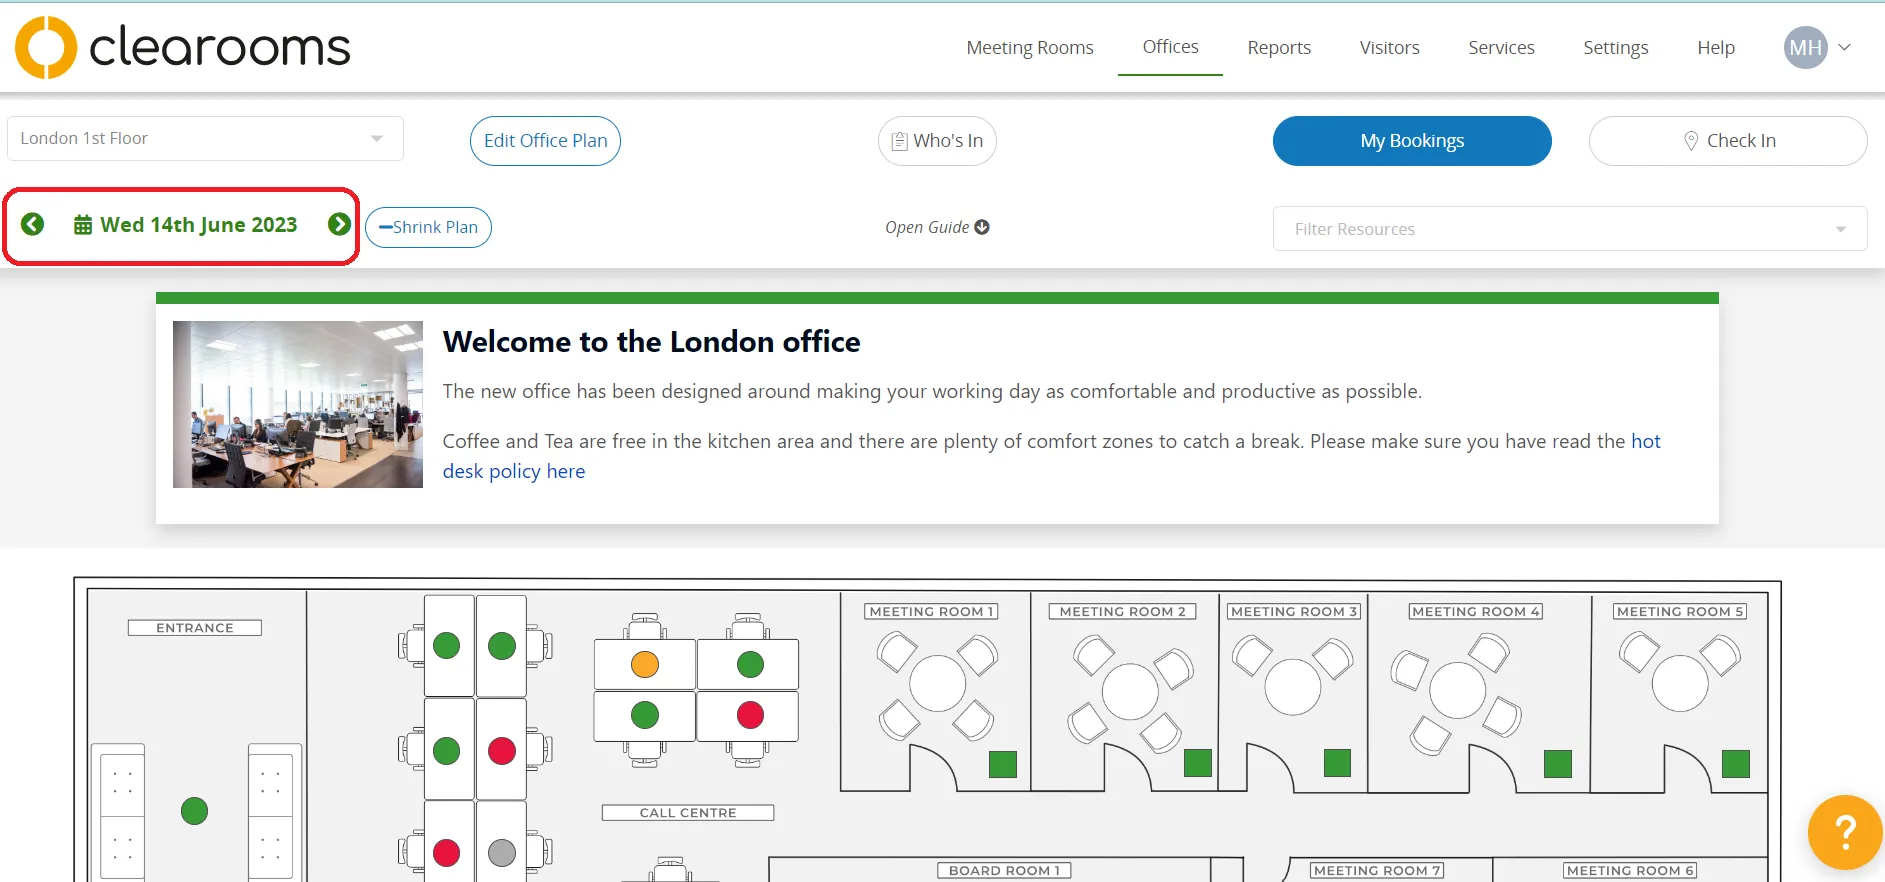
Step 2:
On the upper left side of the screen, you will find a green calendar icon that indicates today's date. Ensure that the calendar is set to the desired date for reserving a desk.
Step 3:
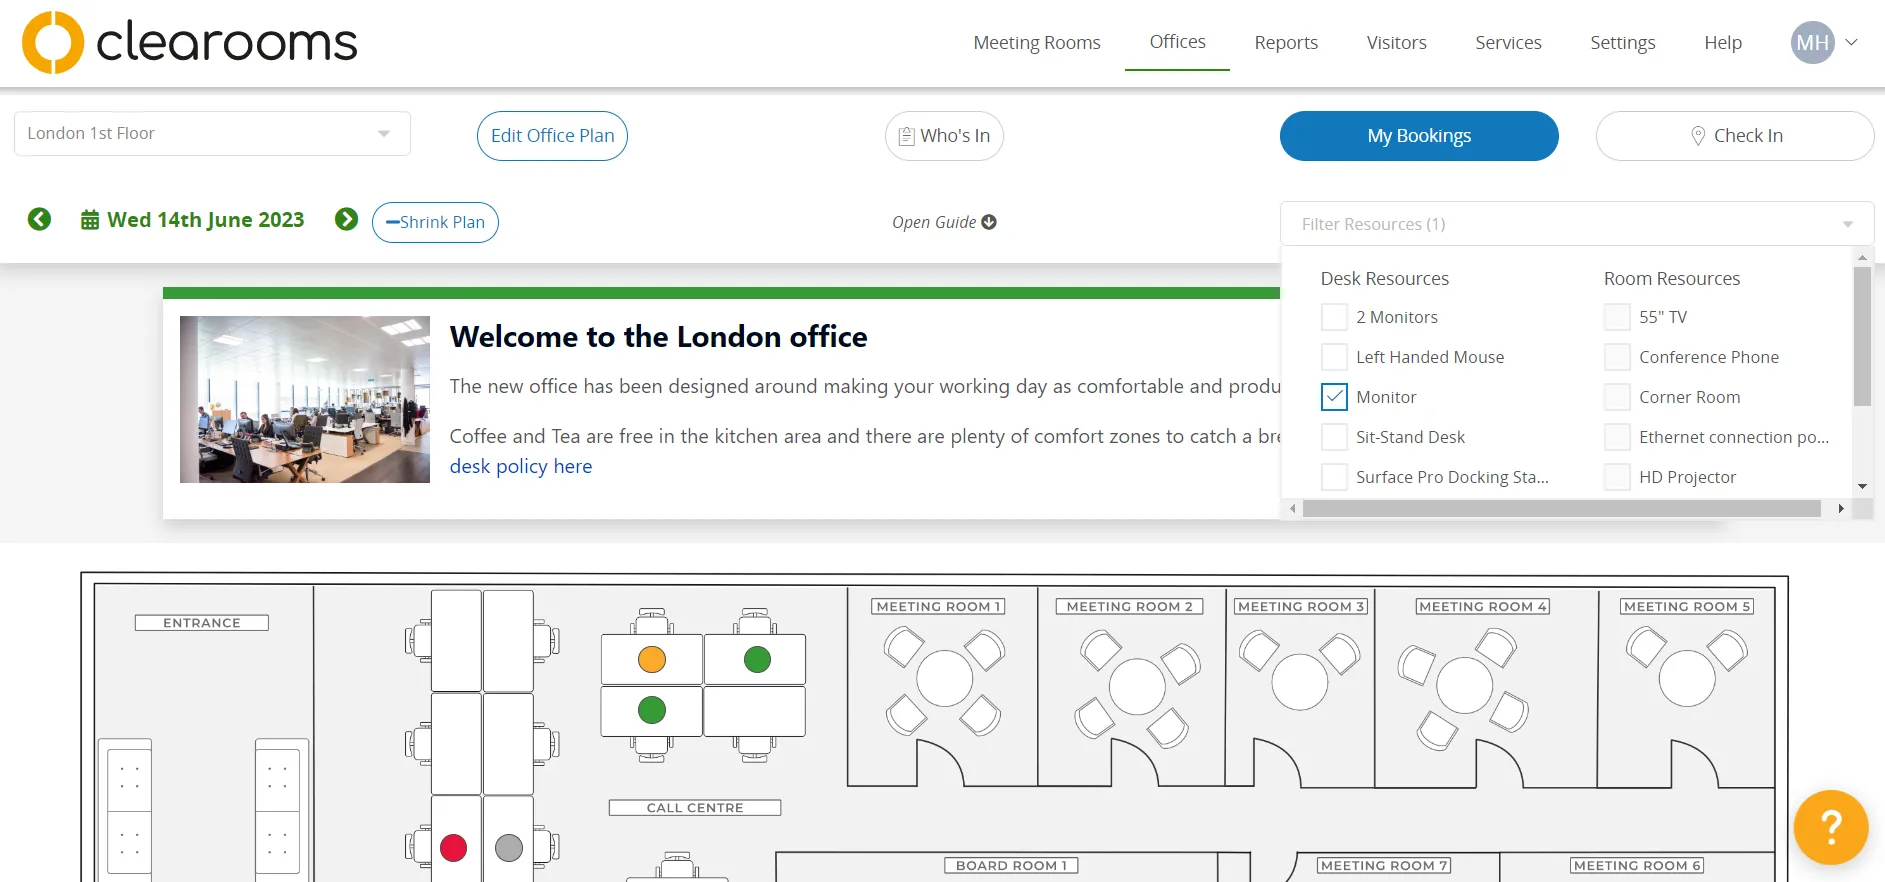
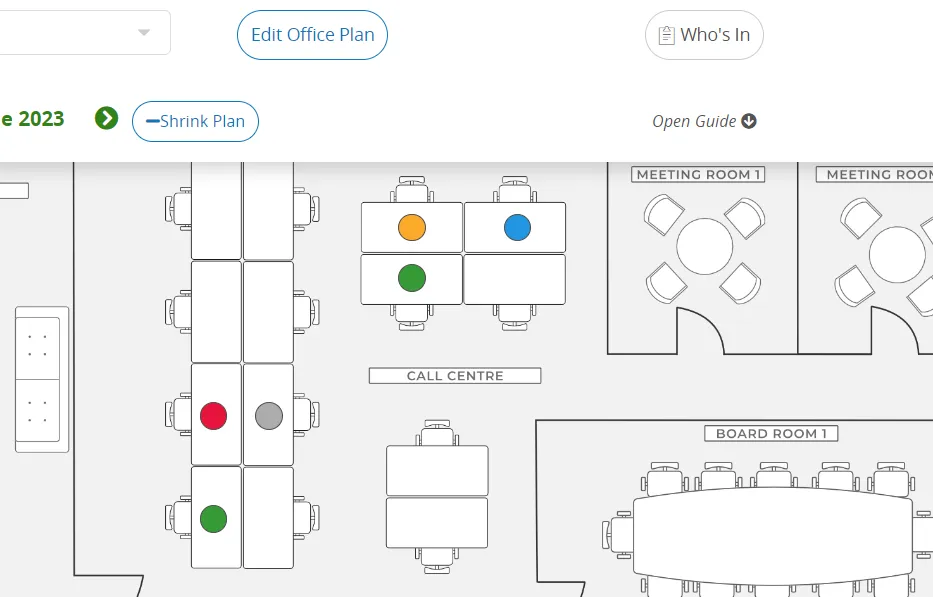
Using the drop-down box positioned above it, select the desired office location where you would like to book a desk.
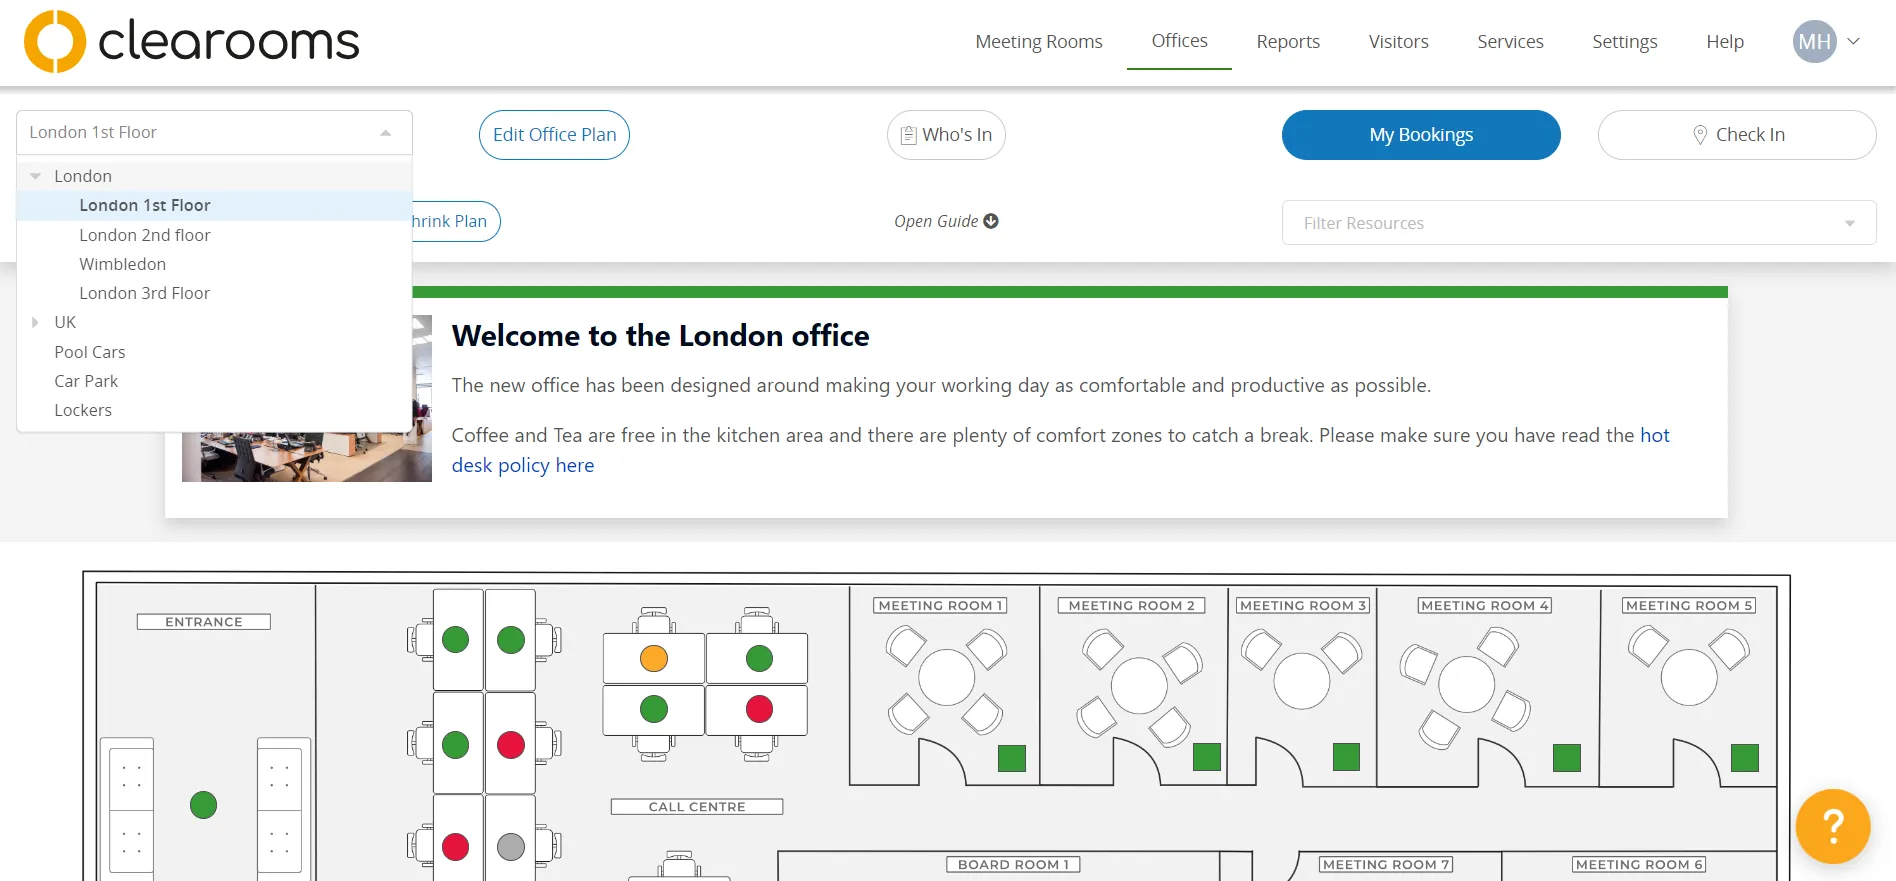
Next, the office floor plan will be displayed, indicating desks and meeting rooms marked with green, red, or grey colours. The red colour indicates that the desk is booked by someone else, the grey colour signifies that the desk is assigned to a specific team, and the green color indicates that the desk is available for booking.
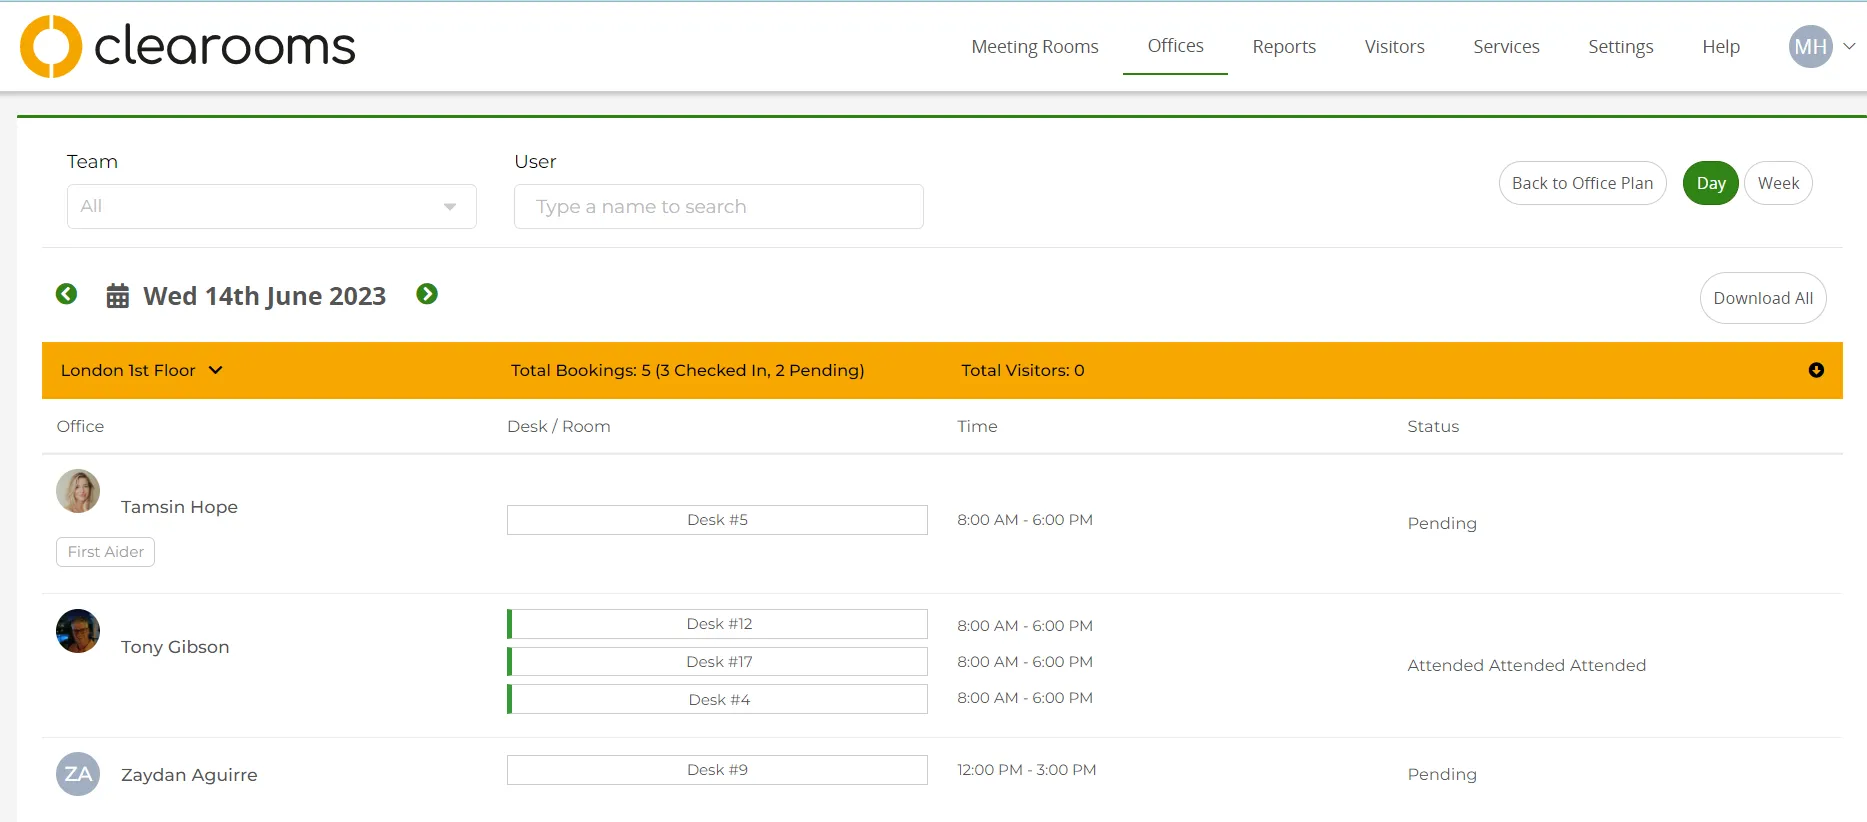
Step 4:
On the top middle screen you can see who will be in the office on the date selected. You can search for users and click the view to see where they are sitting.
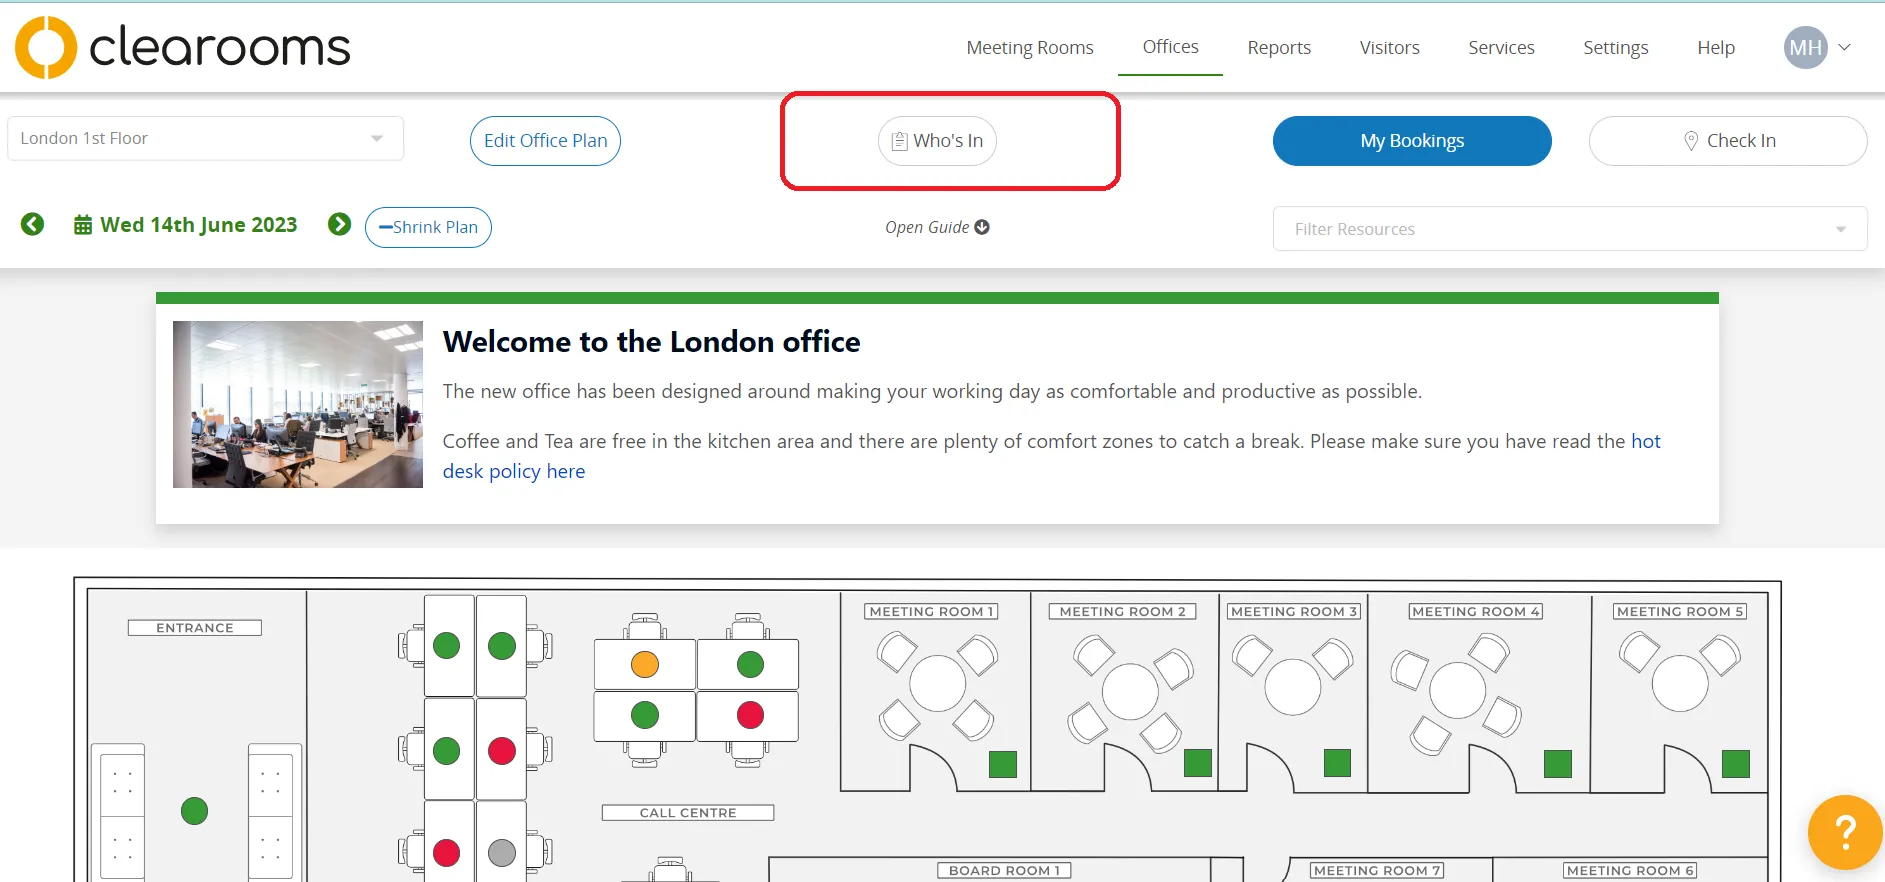
There is a day and week view and the default view is linked to your default office.
If you have First Aiders or Fire Marshals allocated in the system you can see and search for these from this view as well.
Step 5:
If your account has configured desk resources, you will find a filtering option under "My Bookings." By selecting specific resources, Clearooms will automatically hide any desks that do not possess those particular resources.
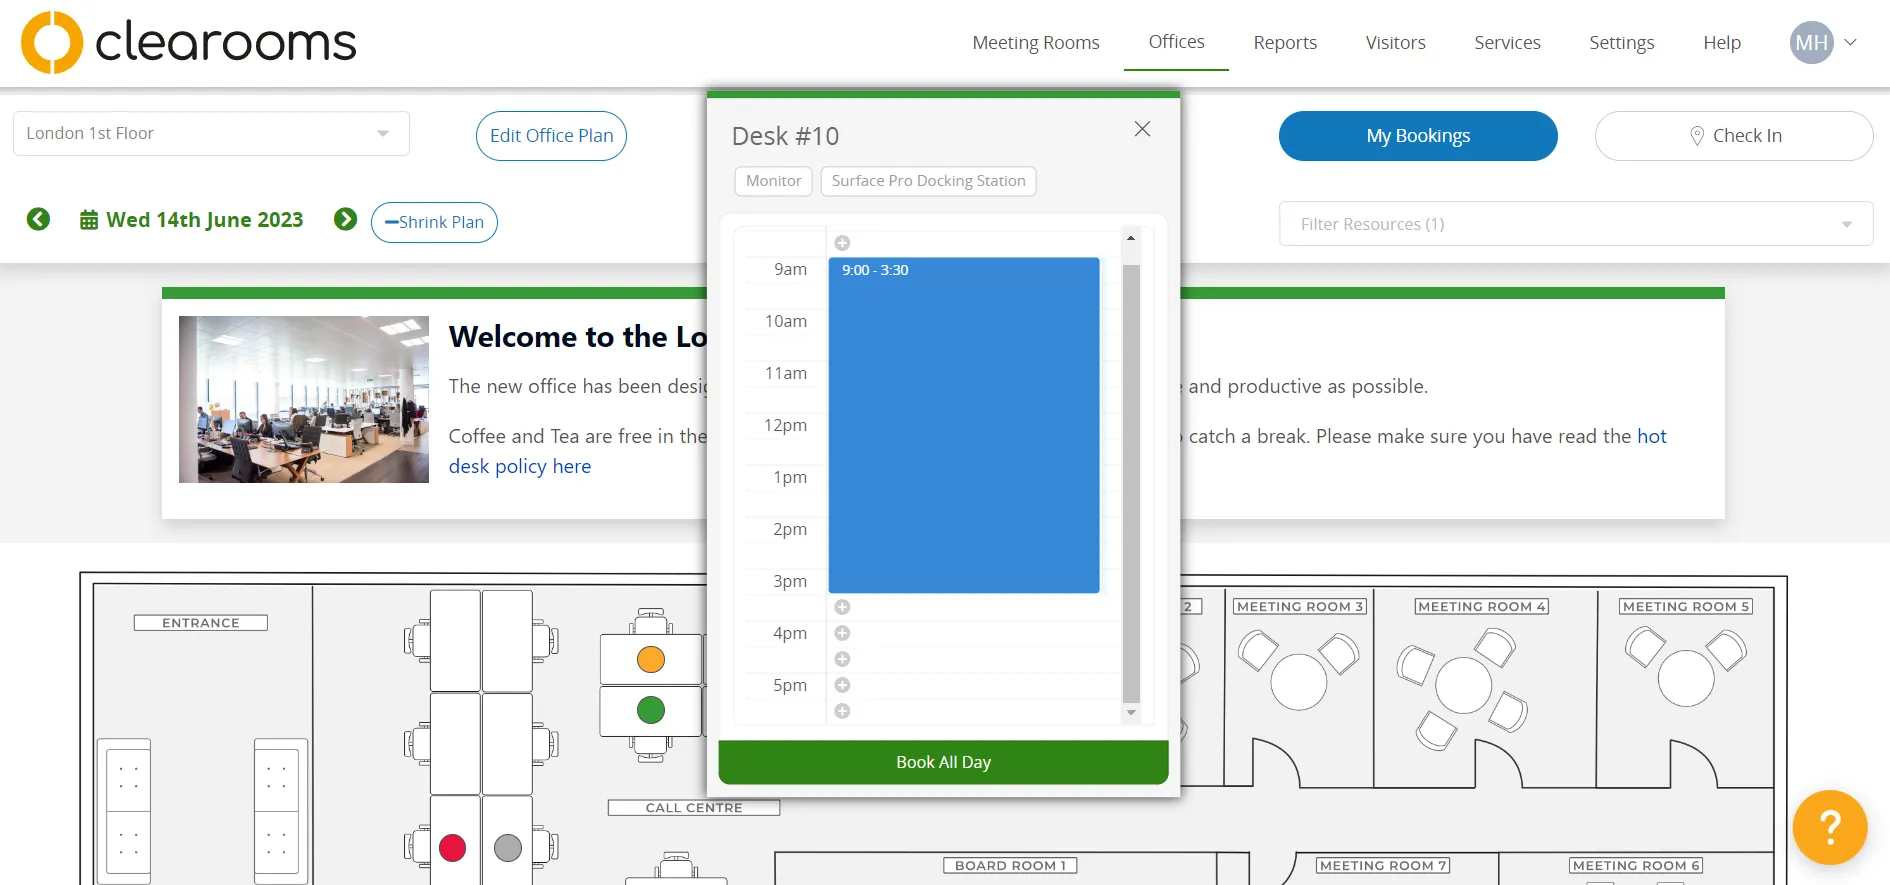
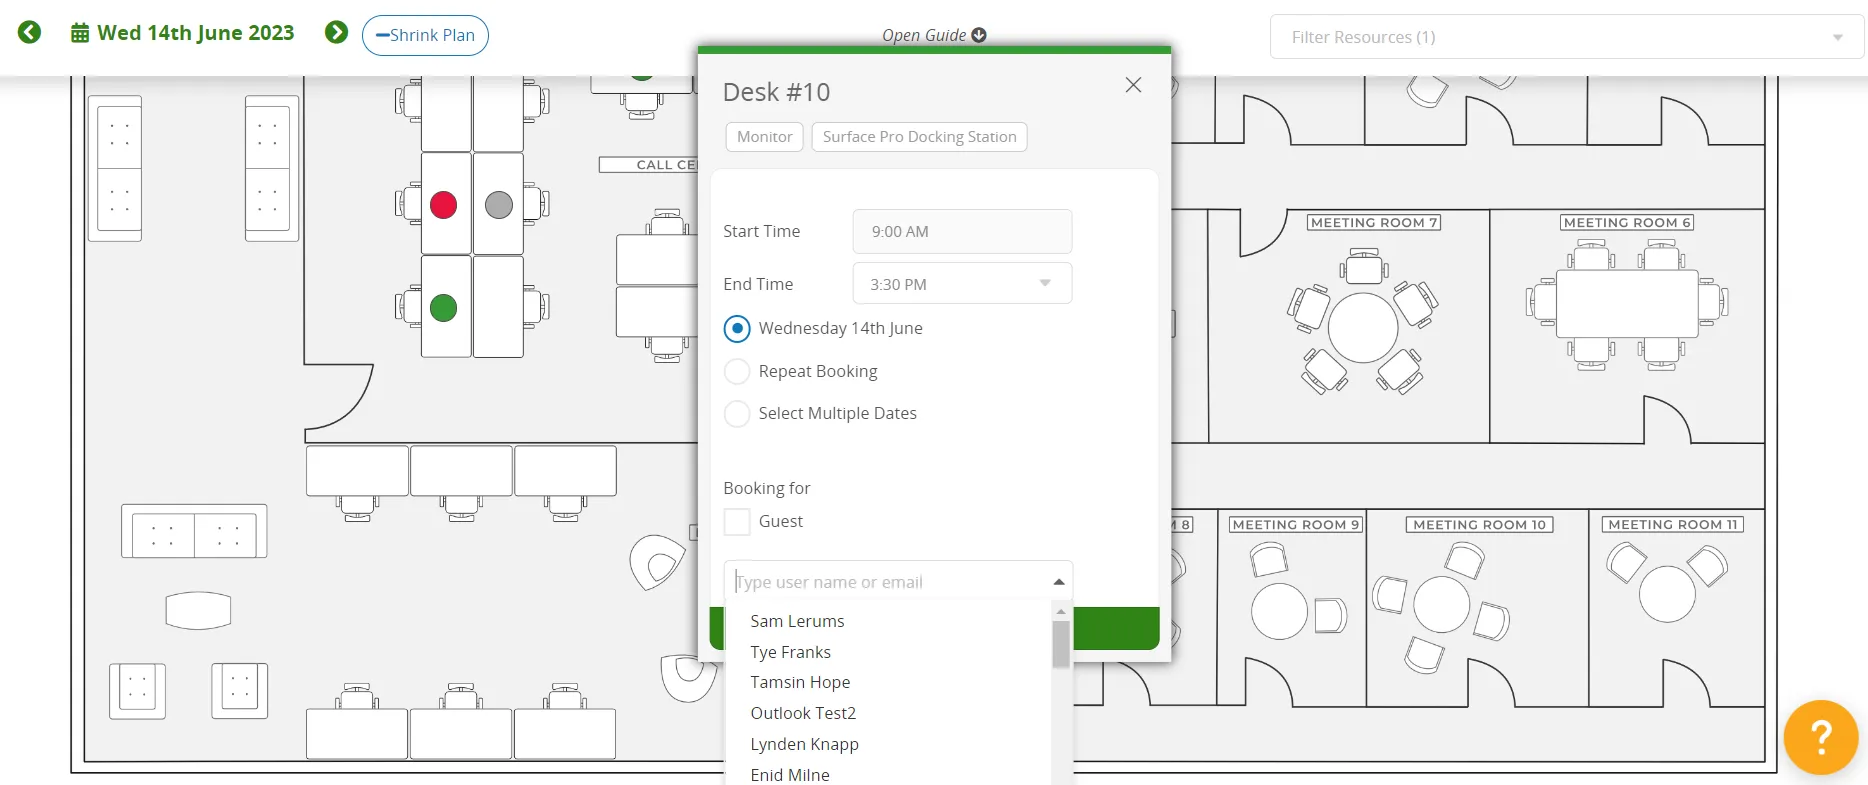
Step 6:
Once you find a hot desk that suits your needs, simply click on the green circle associated with it. From there, you can choose the specific hours you require or opt to book the desk for the entire day.
Step 7:
You have the option to reserve your desk for a particular date or multiple dates, as well as the ability to set up recurring bookings for a specific day of the week.
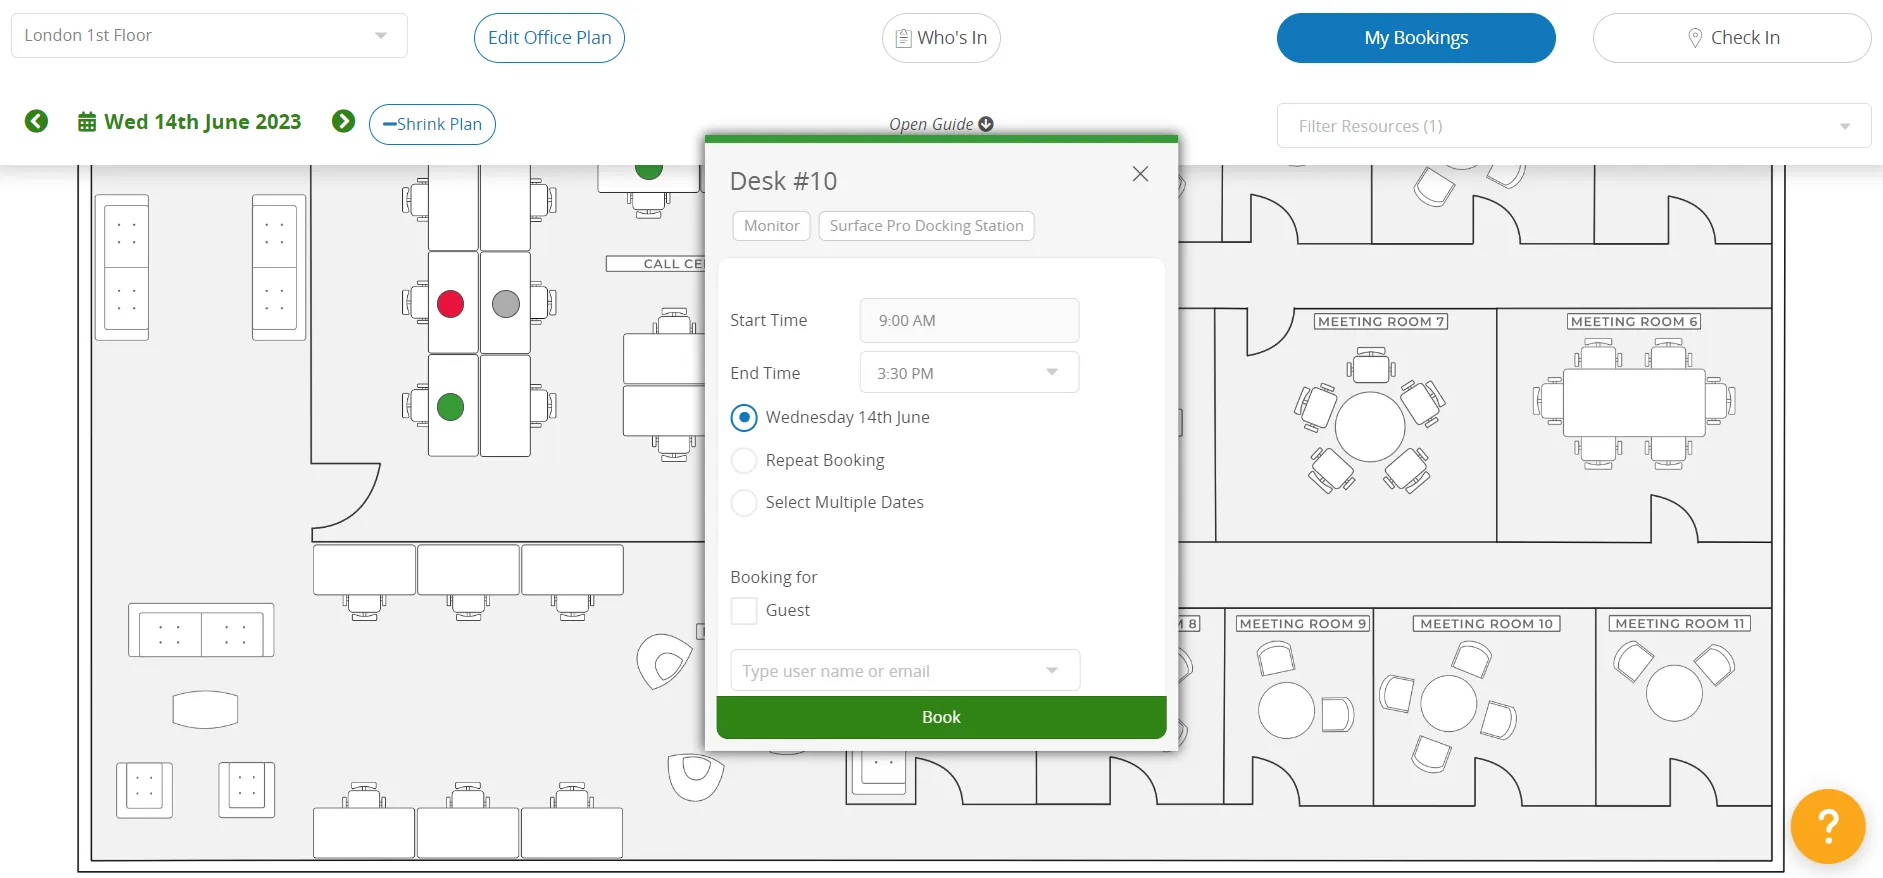
Step 8:
The desk reservation can be made either for a guest or a team member by selecting the appropriate option from the dropdown menu.
Step 9:
After clicking the 'Book' button, the status of the desk will change to 'Blue,' indicating that it has been successfully booked and you have an active reservation into Clearooms desk booking software.
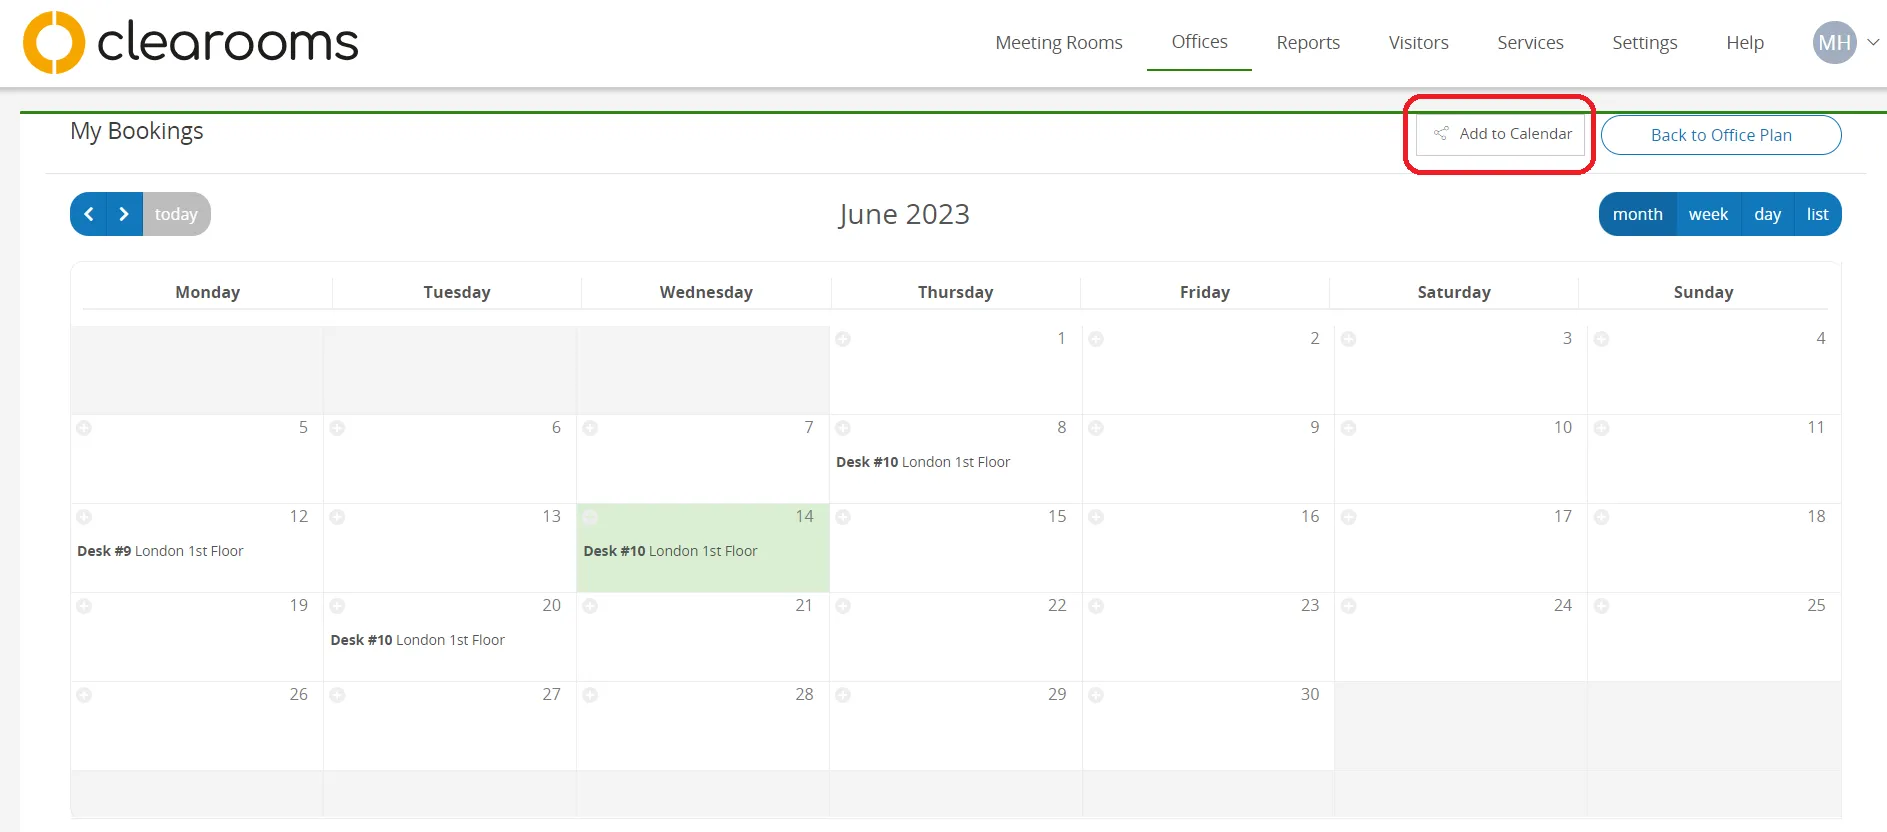
Step 10:
The My Bookings button provides a comprehensive display of all your reservations in a calendar format. Moreover, you have the convenience of generating a feed link through the "Add to Calendar" button, enabling you to view your desk bookings on your preferred local calendar platform, such as Outlook.
Booking desks with Clearooms can greatly enhance productivity and provide a more focused work environment. By following the simple guide we've outlined in this blog post, you can navigate the process with ease and ensure that your workspace meets your specific needs.
Additionally, using Clearooms desk booking system can reduce distractions and create a sense of privacy, allowing employees to concentrate on their tasks more effectively. With our step-by-step instructions and expert tips, you can optimize your workspace layout, choose suitable equipment, and maintain a clutter-free environment for maximum efficiency. Take control of your work environment and unlock your full potential with the benefits of Booking desks with Clearooms.